NODEMCU驱动安装
工具
使用windows系统
下载Arduino IDE,我直接从官网下载的,这里是传送门
Step1 下载并安装Arduino
windows很简单,只需要下载zip文件解压,找到arduino.exe双击运行即可。
Mac版本相对来说比较复杂,需要从在system preferences中设置一下。
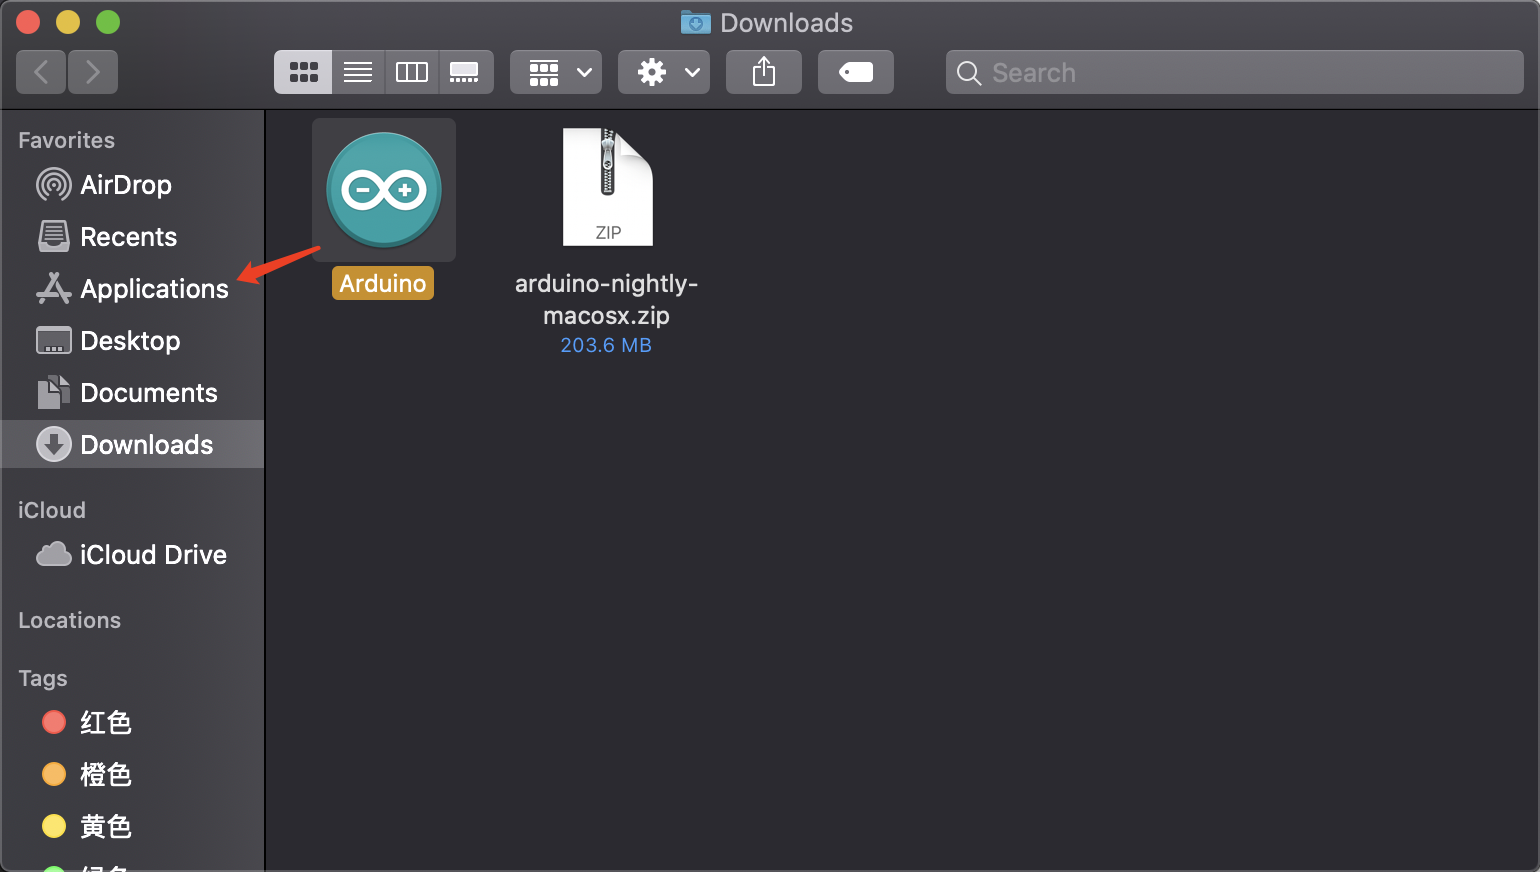
将下载好的zip解压,然后将解压出来的文件拖到Application中
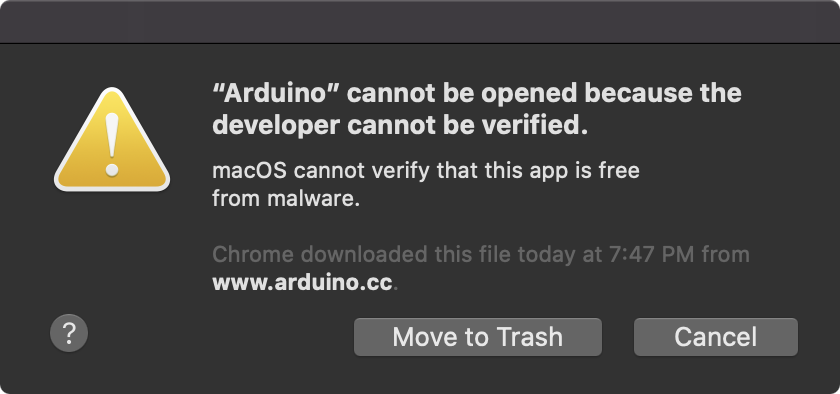
这个时候的Arduino是不能用的,因为并未授权
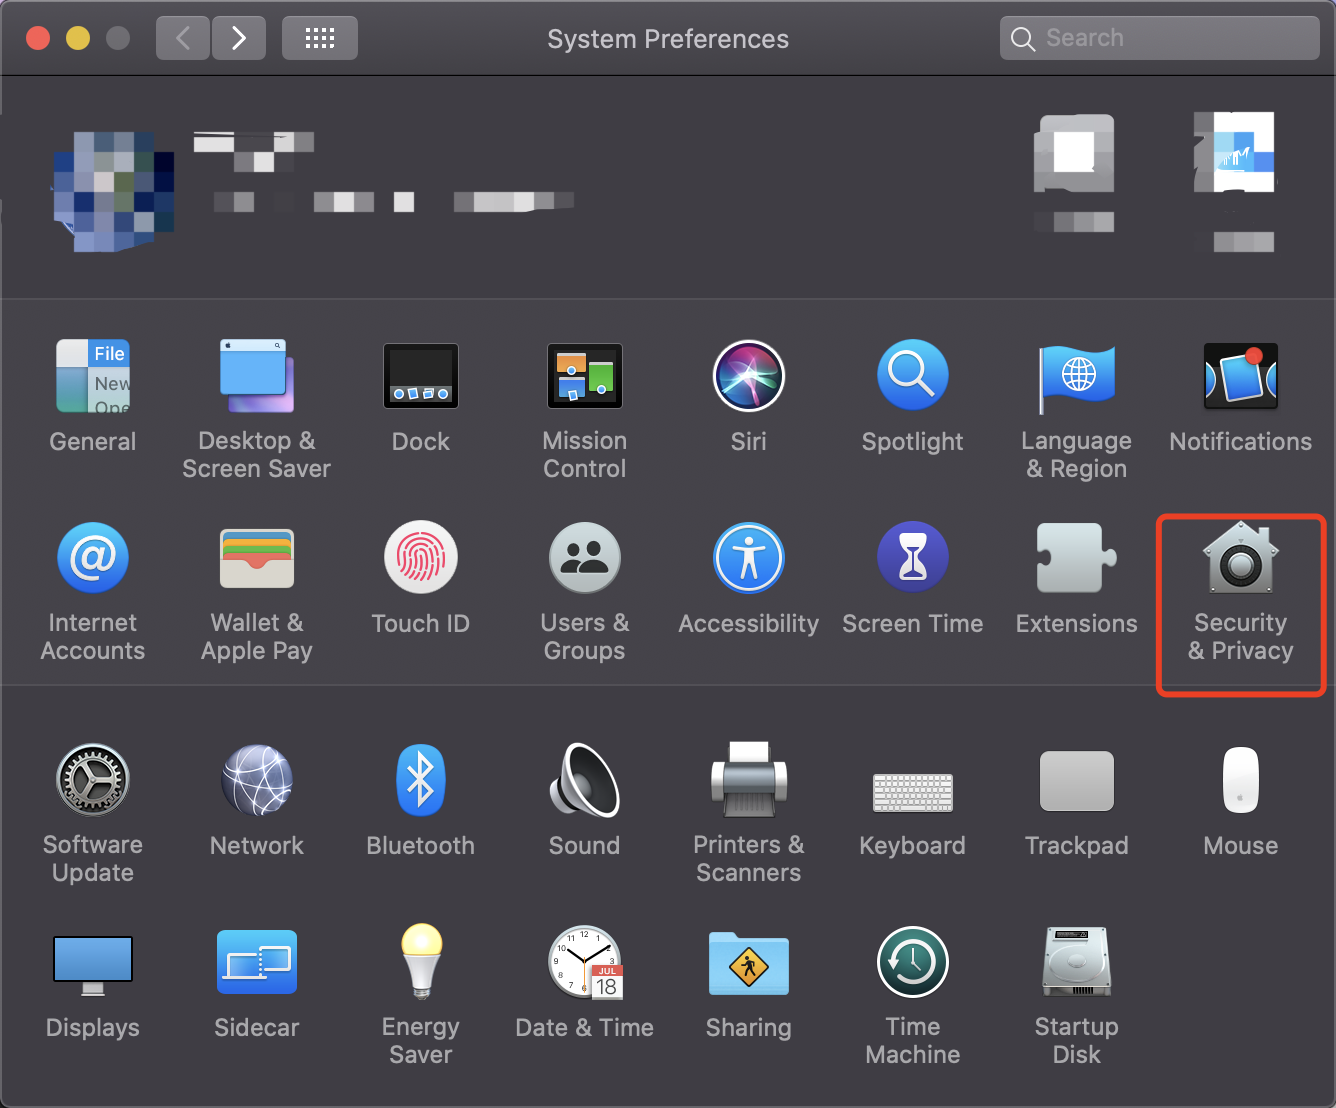
这个时候我们可以打开System Preferences 即系统设置
我们选择Sercurity & Privacy,然后在General中点击Open Anyway
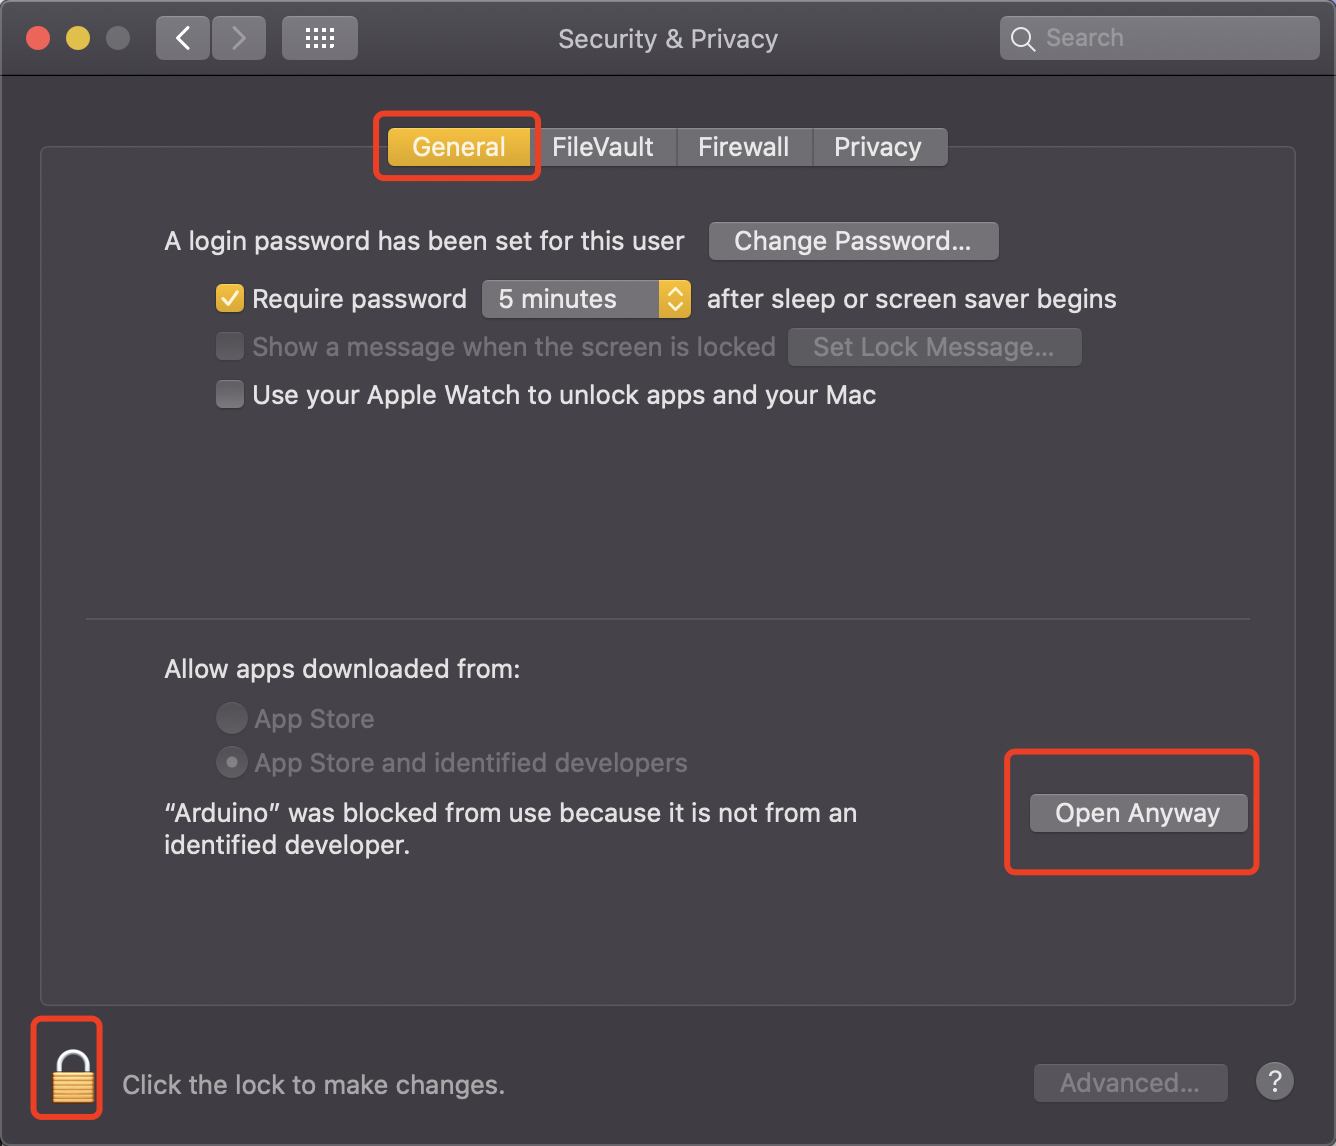
这样我们就打开Arduino IDE了
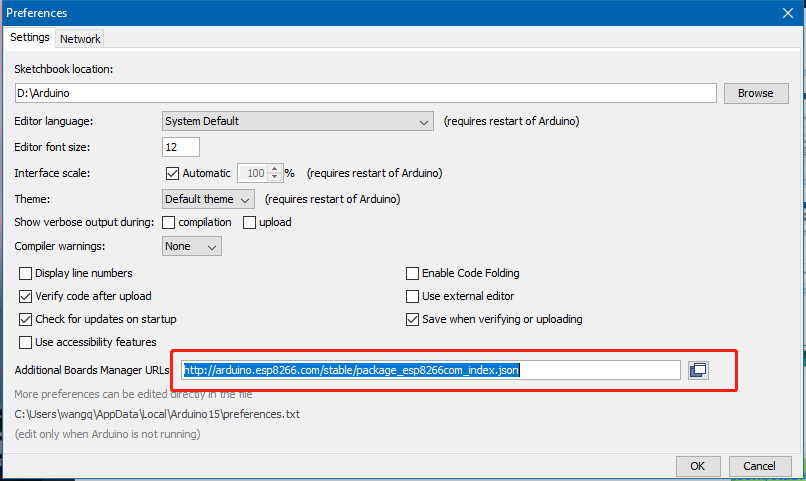
Step2 打开ArduinoIDE 选择Preferences

在下图位置填写以下内容
1 | http://arduino.esp8266.com/stable/package_esp8266com_index.json |
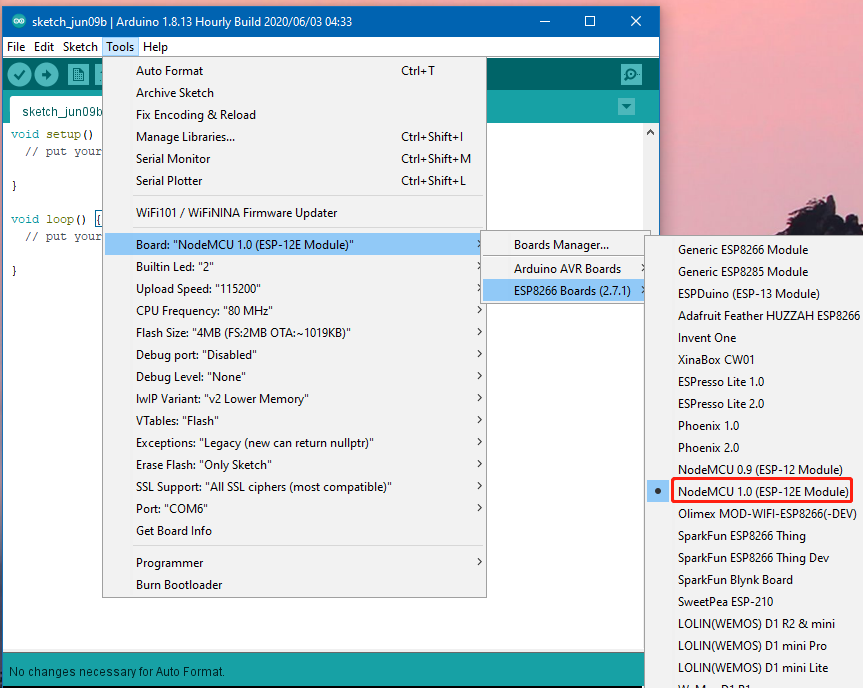
Step3 设置Board
由于我已经设置过了,这里直接显示一下步骤和结果
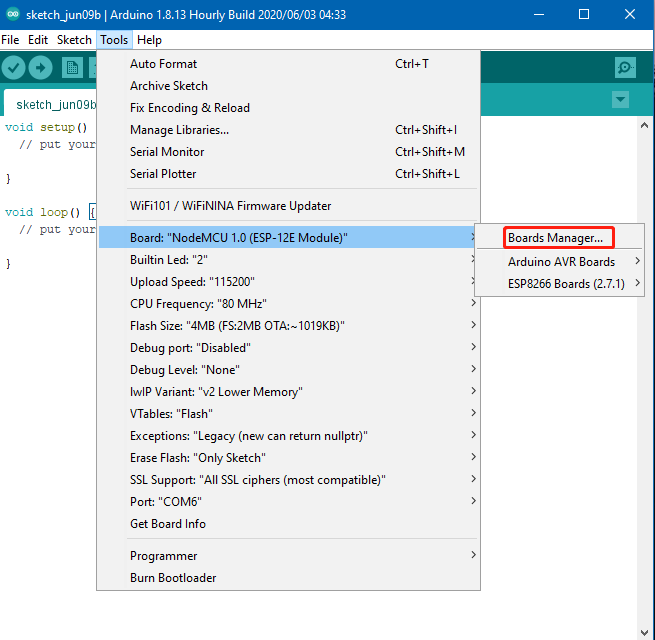

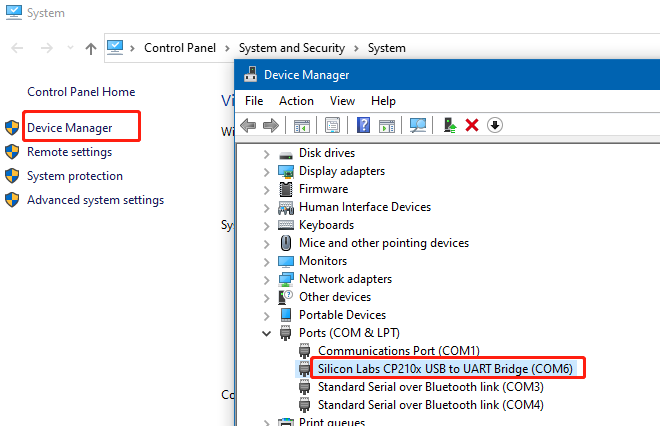
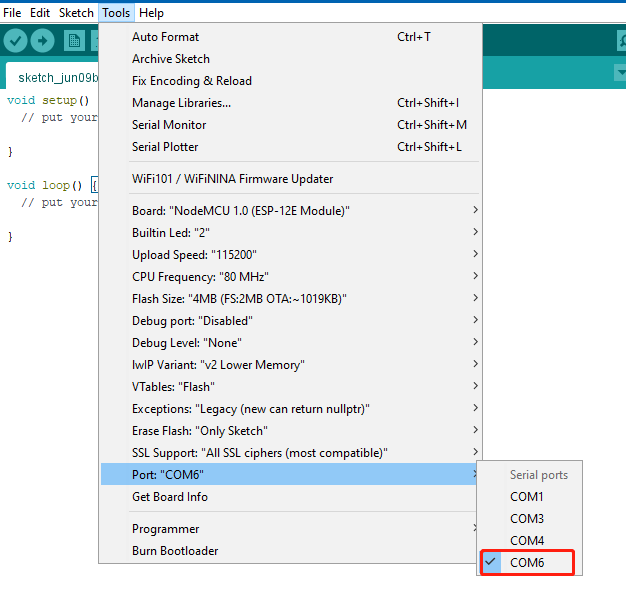
Step4 选择NodeMCU开发版,并设置端口号
我们可以从下图位置获取NodeMCU的端口号
选择NodeMCU开发版
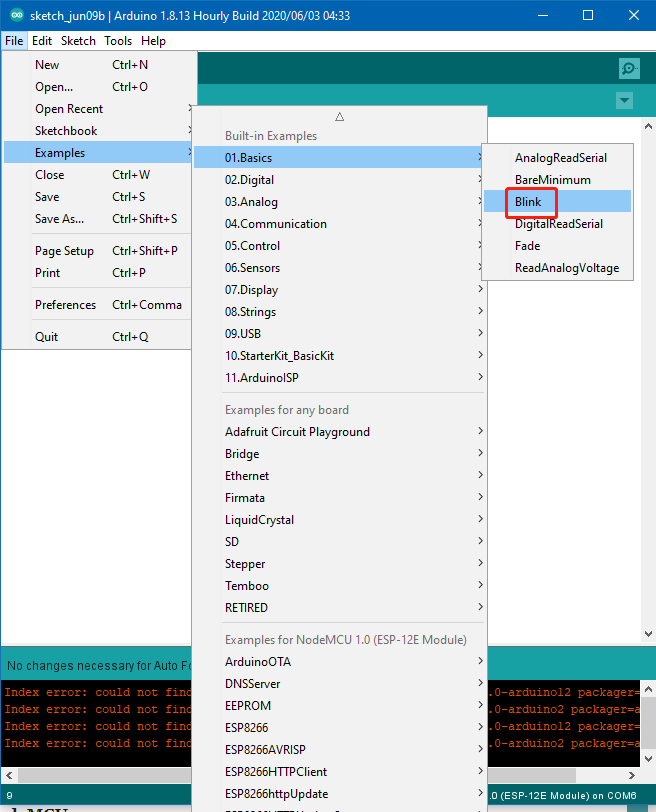
Step5 打开Blink示例程序,编译上传
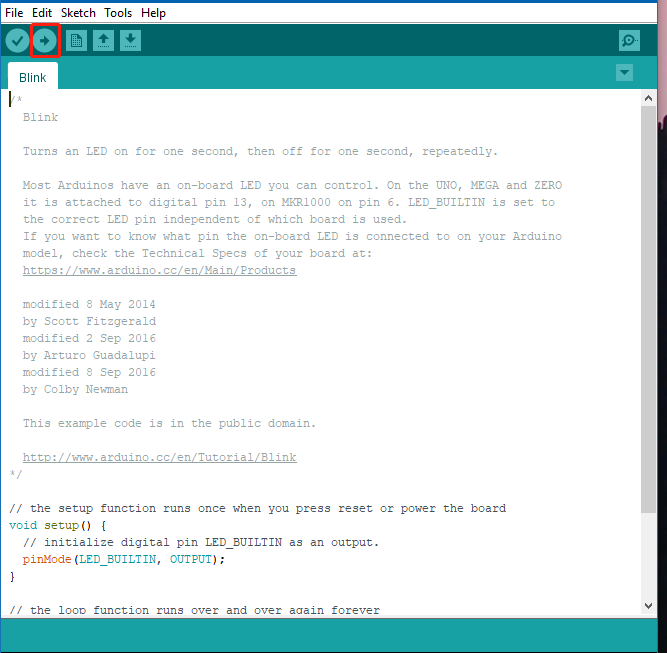
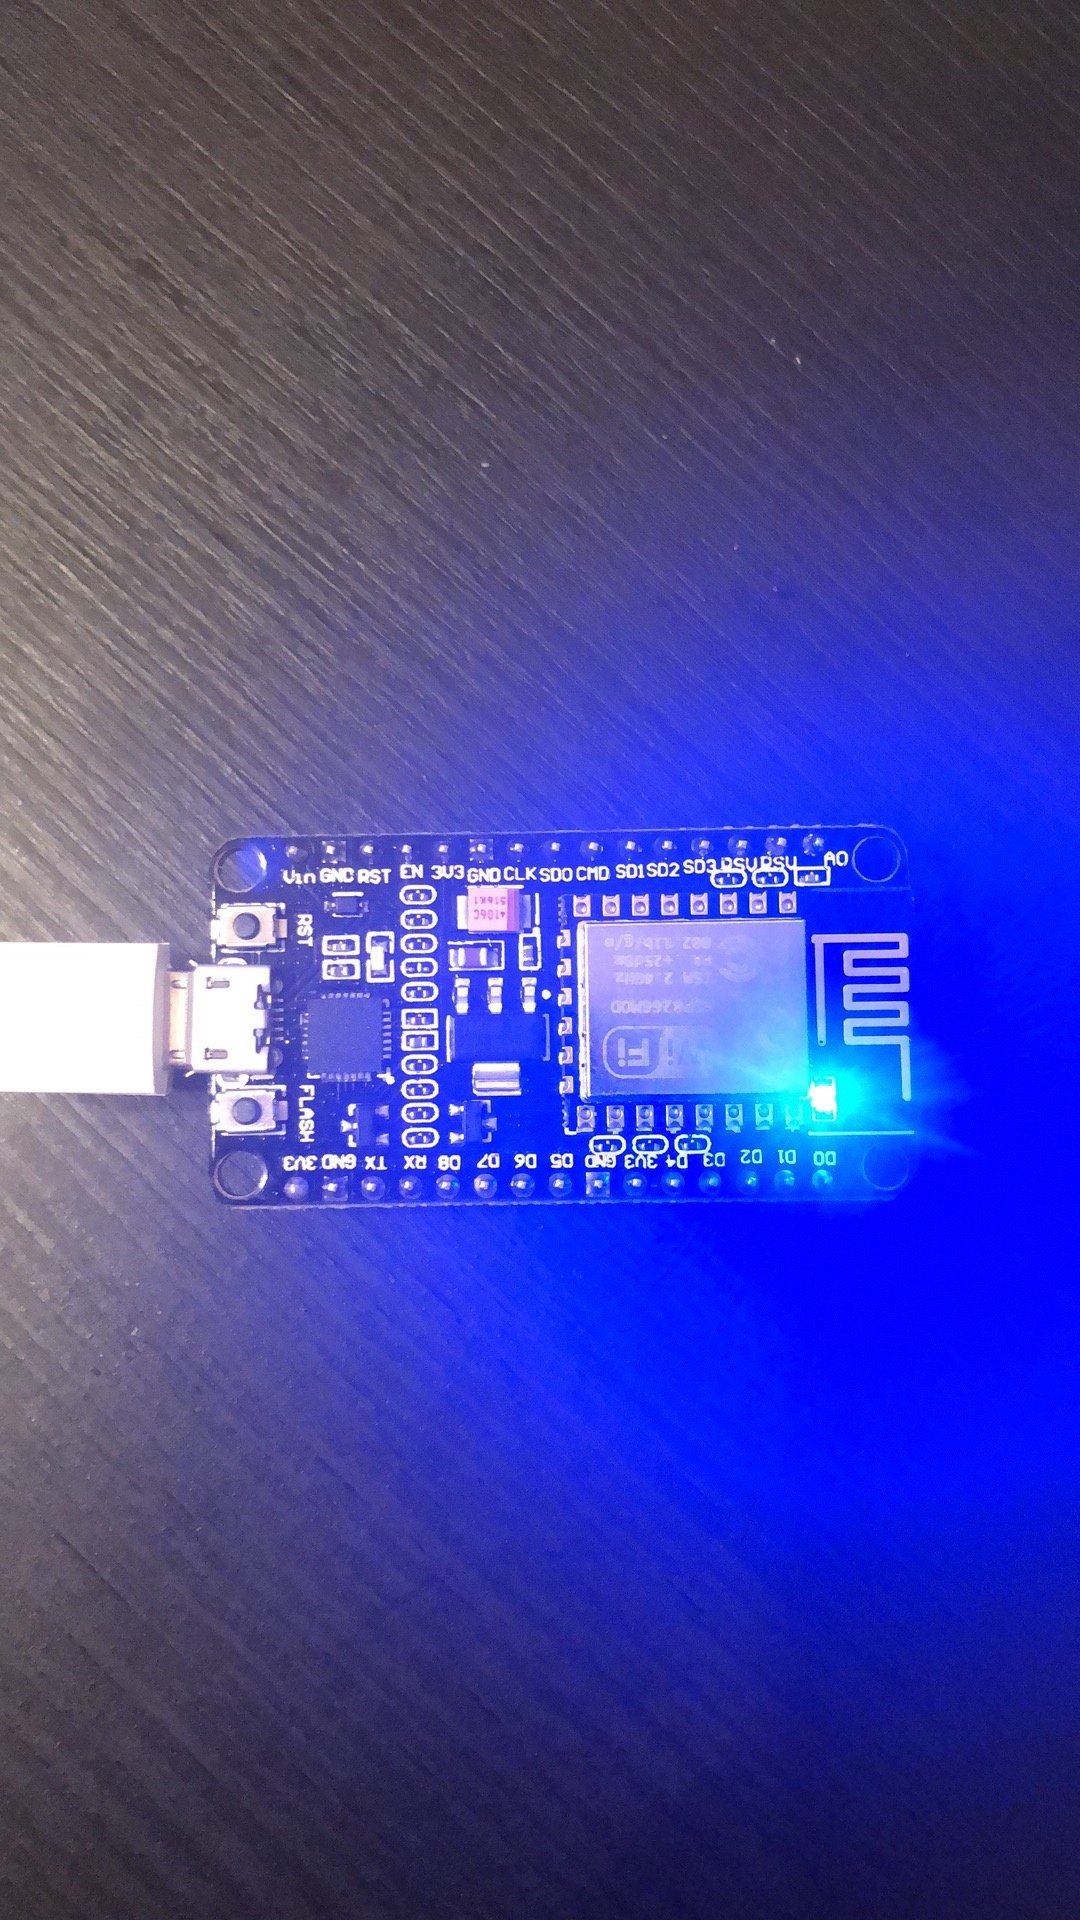
当NODEMCU的蓝灯开始闪烁时,证明驱动程序已经成功安装